Elevating Thrift Store Christmas Swags: How to Make Budget-Friendly Decor Look Expensive
Luxury Christmas Decor: Unveiling the Potential
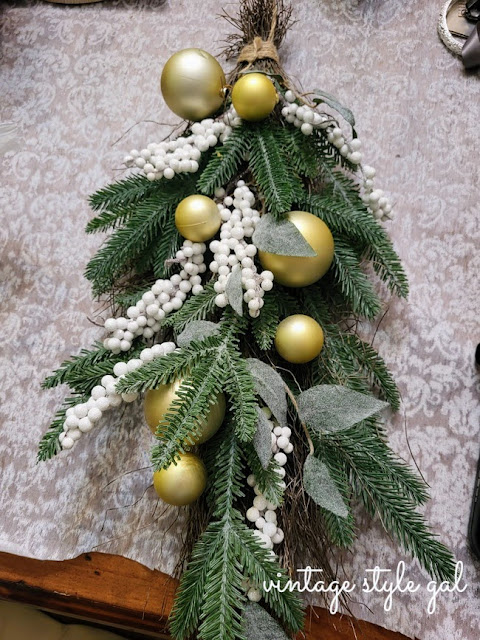
Upon a second glance, I opted for not one but two of these budget-friendly swags. While the overall appearance wasn't too shabby, the gold-green hue of the ornaments didn't quite align with my taste. Determined to make these holiday decorations shine, I contemplated tearing them apart for other projects.
However, a change of heart led me home with a plan to enhance rather than dismantle. The solution? Enter Rub-n-Buff, my secret weapon for adding a touch of opulence to DIY projects.
I have been talking about and using rub n buff for many years, for those unfamiliar, you may be asking what is rub n buff and how to use it? Rub-n-Buff is a metallic wax-based paint renowned for providing a rich, authentic-looking finish without the need for metal plating.
Upscale Christmas Decorating: A Rub-n-Buff Transformation
Armed with an assortment of colors, I choose Antique Gold to breathe new life into those lackluster ornaments. Carefully applying the Rub-n-Buff, I transformed each bulb one by one, ensuring a beautiful antiqued gold hue that exudes sophistication. Opting for a small brush this time (I usually use my fingers), I navigated the branches with precision, steering clear of any mishaps.
You may be wondering can you change the color of ornaments? The answer is a resounding yes, and the transformation is evident. Compare the before and after - one ornament boasts a deeper, richer tone, while the other looks a bit green around the gills. Call it picky, but certain colors matter, and the Rub-n-Buff trick saved me from potential regret.
Exclusive Seasonal Embellishments: Eliminating Imperfections
Spot a scratched ornament? Rub-n-Buff to the rescue once again. A layer of this magical metallic wax not only changes colors but also conceals imperfections. The scratched gold bulb undergoes a seamless makeover, emerging flawless and ready for the next phase.
Chic Holiday Home Accents: Adding the Finishing Touch
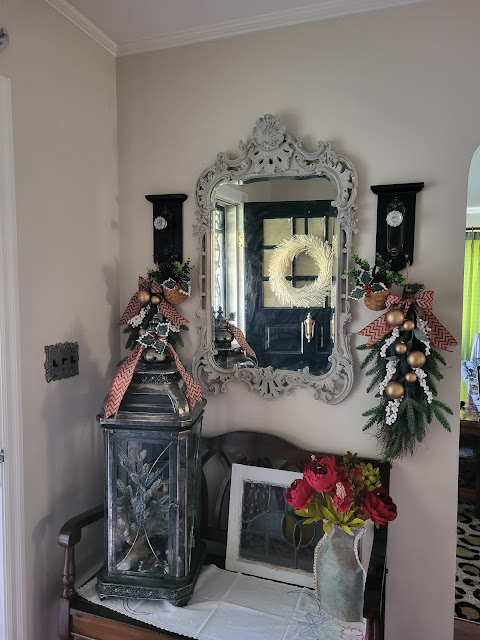
Now satisfied with the rich gold color and flawless ornaments, it's time to elevate these budget-friendly Christmas swags further. How? By adding a touch of ribbon to the branches and bobbles (enlighten me, I am tapping into my English heritage today, saying that in my most British accent). A chevron metallic red and burlap ribbon, purchased from Walmart, turns into simple, elegant bows that truly make these swags shine.
Prestigious Yuletide Ornaments: A Festive Makeover
What's the verdict? Do you prefer the after to the before? Regardless, the scratches are gone, the ornaments radiate a rich gold color, and the budget-friendly Christmas swags are ready for their grand debut in our foyer.


Cara , this is beautiful and the perfect way to up style inexpensive greens. I love the touch of gold you have added. I sure hope you are enjoying the last two weeks before Christmas.
ReplyDeleteI was so happy that I changed my mind and went back for these budget friendly gems! I was even more excited with how they turned out in our entryway. They will be easy enough to change up year after year too. Hope you are enjoying yourself too, and Merry Christmas.
DeleteWow, I was so happy when I hit publish and did not get an error!!!! Woo hoo!!! I am celebrating over here.
ReplyDeleteAhh.. thank you Wendy for trying again, yeah for success! Thank you again my friend. <3
DeleteI wish I was better at decorating my apartment for the holidays, my husband and I seem to have lost some inspiration for it over the years so seeing this is really helpful. I love the green and gold and the easy way it can be created. Thanks for sharing this!
ReplyDeleteI can understand losing inspiration for the holidays Molly. I did a few years ago, and felt blah. I felt even worse when Christmas came and went, and I did not decorate. Our decor is slim this year because we have a big project happening and I did not want to add to the stress of more clean up, but I have to say, I feel less "sparkly" this year since everything is not all dressed up for Christmas. I am so happy you found inspiration here, you just made my day!
DeleteThese turned out so great! Gotta love Rub-n-Buff! That stuff is like magic! Instant transformation! Happy Holidays!
ReplyDeleteI am a big fan of it too. It never disappoints, and always looks great once applied. Did I mention easy? You have some awesome projects using rub-n-buff too.
DeleteGreat minds think alike, Cara! I did this same thing on our garland and a wreath we picked up this season too. It really does give holiday decor and ornaments like these new life. Rub n Buff steals my heart every single time. Plus it's ready to use which I always appreciate. Big hugs, CoCo
ReplyDeleteWe do in deed! I saw your ornaments and they look spectacular CoCo! My mom introduced me to rub-n-buff in my early 20's and I never looked back! I love all of the things you can create and do with it. I feel like it really elevates every craft from simple to elaborate.
Delete