Crafting on a Budget: DIY High-End Home Decor with Moldable Air Dry Clay
Craving high-end home decor but on a tight budget? This blog post shows you how to transform a simple clay mold decoration into stunning bells using moldable air dry clay. Learn crafting tips, explore endless project ideas for these versatile bells, and discover how to create luxurious home decor without spending a fortune.
Do you dream of a home that exudes elegance and sophistication, but your wallet screams "beer budget"? You're not alone! For many of us, achieving that high-end aesthetic feels out of reach. But fear not, creative minds! This blog is your haven for transforming ordinary items into extraordinary home decor, all without breaking the bank.
My passion for crafting home decor blossomed a year ago when I embarked on an upcycling journey. It opened my eyes to the endless possibilities hidden within everyday discards. Imagine transforming what most people toss away into beautiful pieces that elevate your living space! If only Ms. Goss (my 7th grade art teacher who thought I had zero imagination) could see me now! I really wish I would have not allowed her to influence me back then, but I have grown since, thankfully.
If you've been following along on this creative adventure, you know I'm an eternal experimenter. Whether it's whipping up delicious new dishes or breathing life into forgotten treasures, I'm always on the hunt for innovative ideas. Today's project is a testament to that spirit!
Clay molds have always captivated me. The intricate details and finished pieces radiate a sense of luxury. Let's face it, who wouldn't love a home adorned with high-end decor? While hefty price tags often accompany such elegance, there's a way to achieve a similar look without emptying your savings account. Think of those stunning homes in Bexley with their character-rich features – board and batten walls, eight-panel doors – a constant source of inspiration for my own humble abode.
A few weeks back, I felt the urge to explore the world of decorative molds. While most people associate this particular mold with Christmas ornaments, I envisioned something entirely different – sophisticated home decor that transcended seasonal limitations. Don't get me wrong, Christmas decorations hold a special place in my heart, but have you considered the treasure trove of potential high-end decor for your home found at after-Christmas sales?
A vision danced in my head – a trio of bells, strung together at varying heights, gracing my wall or mantel. The image sparked immense joy, and I knew I had to bring it to life. The first step involved acquiring a decorative mold, which I promptly added to my shopping cart. Next came the crucial choice: the crafting medium.
Traditionally, air-dry clay would be the go-to option. However, I craved something with a little more flexibility. After scouring online reviews and seeking the perfect "bang for my buck" option, I stumbled upon a unique discovery – moldable air dry clay! Intrigued by its affordability and glowing user reviews, I decided to take the plunge.
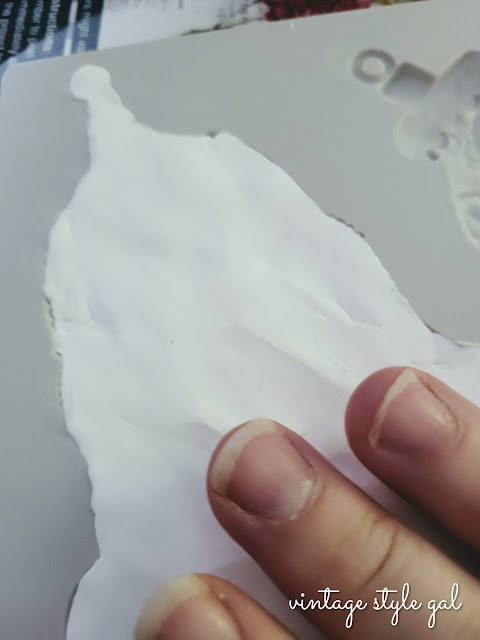
The moment the package arrived, my inner child erupted with excitement. Tearing it open, I eagerly embarked on my experiment with this newfound treasure. The first impression? Incredibly light and airy! True to its name, the "foam" element gave it a whipped cream-like texture. This lightness translated beautifully to the mold. The clay effortlessly filled every nook and cranny, capturing the intricate details with remarkable precision. However, due to its airy nature, removing the molded clay required a delicate touch, unlike the typical sturdiness of regular clay.
With the first bell complete, the urge to create a full trio proved irresistible. Leaving them to dry overnight, I awaited the results with bated breath. The next morning, I was greeted with a delightful surprise! Unlike the typical stiffness of traditional clay creations, these bells were remarkably lightweight and retained a subtle flexibility.
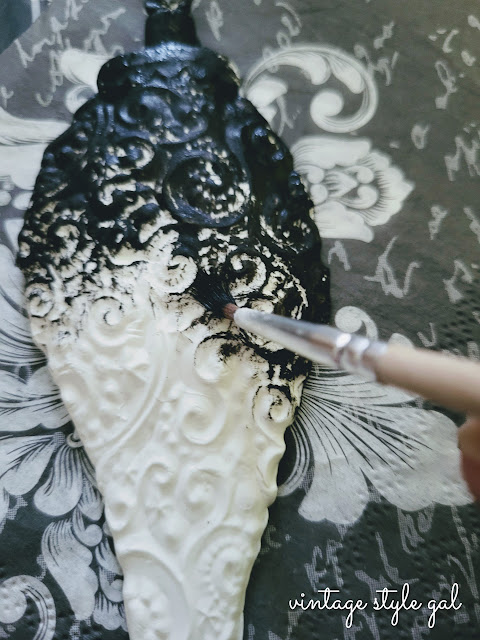
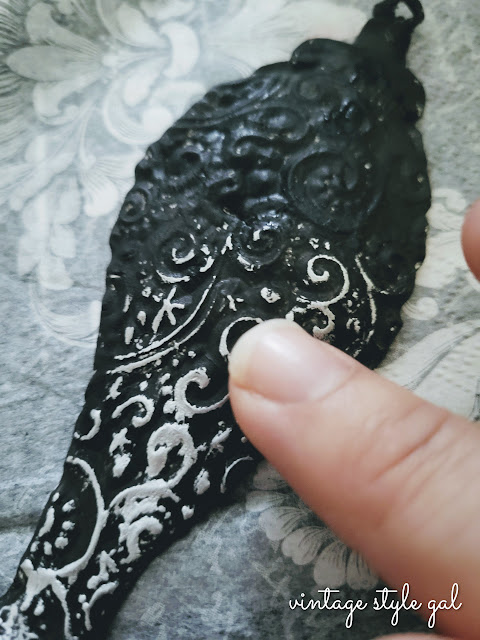
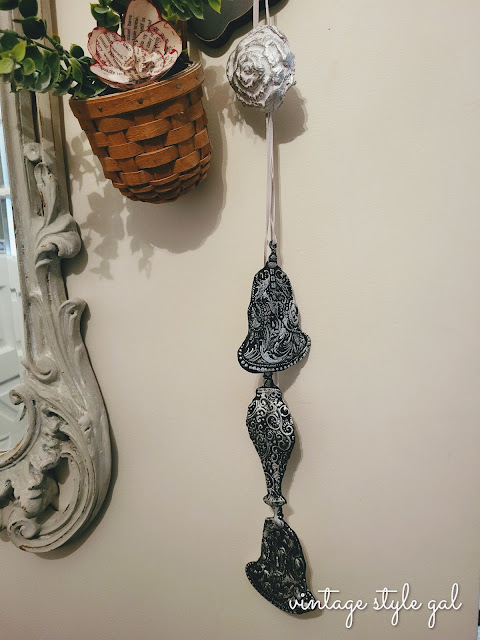
Now came the truly fun part – transforming the stark white clay into stunning Victorian bells looking as if they had been around for Lord knows how long. I opted for a sophisticated black paint job, allowing it to dry completely before adding a touch of silver magic. Using rub-n-buff, I meticulously accentuated the decorative elements, highlighting the beautiful cameo details. This step truly brought the bells to life, adding depth and dimension. Of course, with a mischievous glint in my eye, I couldn't resist crafting a third bell to complete the elegant trio.
This project ignited a spark of creativity, and I couldn't wait to see these little beauties come to life in different settings. While they initially graced the china cabinet key, their versatility shone through. Their light weight made them perfect for hanging on a simple hook in the entryway. With a slightly larger loop, they could have even adorned the front door handle, adding a charming jingle (add brass bells to the trio for the full effect) with every opening and closing. However, the possibilities didn't stop there!
 |
| Feed the velvet ribbon through the ornament loop and knot at the back |
 |
| Tie each ornament ribbon together |
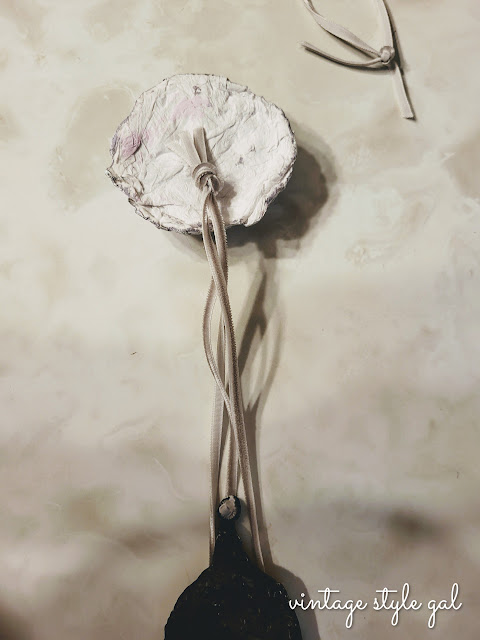 |
| Hot glue knot to decorative piece, add lots of hot glue to the back for sturdiness |
 |
| More to come on how I made this decorative flower soon, so easy, and budget friendly |
I wasn't exactly sure how I was going to get my bells to hang from the key, but I opted to use another DIY experimentation (I will share how I created this flower soon, I promise. I know you will be surprised.) I worked on last week. See, I am an experimenting machine, I simply cannot get enough. I love sharing how you can have the home of your dreams without spending a lot of dough. The ideas keep coming so stick with me, I am sure one of these ideas will be something you will want to try for your own home.
This project is just the beginning of our creative journey together. Stay tuned for future blog posts where I'll explore even more ways to utilize moldable air dry clay and other crafting materials. We'll explore unique project ideas, and unlock the full potential of budget-friendly home decor. Together, we'll transform your living space into a haven of style and personality, all without breaking the bank. So, grab your crafting supplies, unleash your creativity, and get ready to embark on a journey of DIY delight!
Don't Forget to Pin for Later!
Ciao,
Cara





Very cool, Cara!! I love working with air dry clay, but I usually reserve it for the holidays. I don’t know why I don’t think about using it for all year-round home decor. Thanks so much for this great tip. I need to get my clay out of the closet! ☺️
ReplyDeleteThank you Kim. I've only worked with clay a few times, but I think I could be hooked now. I am considering so many more possibilities to decorate with it.
DeleteCara,
ReplyDeleteThanks so much for your visit and for your prayers... It has been gratefully appreciated....Joe passed away peacefully and comfortably in a Hospice Unit on April 16th...
Hugs,
Deb
Debbie-Dabble Blog
Oh Debbie, that breaks my heart. I am sending prayers to you and your family. I am so happy Joe was able to meet your granddaughters, that was a blessing.
DeleteI can't get over these, Cara, they look amazing! I love how you can leave them white or paint them. The patina you added is really pretty and makes the texture come to life. They're fabulous! Hugs, CoCo
ReplyDeleteYou are too sweet CoCo, thank you. I try to use rub-n-buff as often as I can because I always love the patina it leaves behind. Hope you are doing well.
DeleteI have never used air dry clay before, but it seems to be a great way to create and craft! I love these Victorian bells, they look so good!
ReplyDeleteThank you Molly, air dry clay is such an economical way to decorate your home! I am thinking of so many ideas and ways to use it in our home now. Experimenting is so much fun.
DeleteThese turned out so pretty! I used air dry clay for the first time this Spring and I loved it too! It's so fun to work with! Can't wait to see how you use it next!
ReplyDeleteI have ideas, but they all seem to be pretty formal at the moment, and I like to think spring is all about being casual, letting our hair down, and enjoy being in the moment after winter's had it's way with us. I am looking forward to seeing your next air dry clay project too Donna!
Delete