We use advertising and affiliate links from Amazon and other retailers as a means of generating revenue on this website. We do not recommend services or products we do not personally resonate with.
Saturday, March 6, 2021

Spring Decorating Idea

Looking for spring decorating ideas?  Here is a simple idea with blue and white eggs to get you ready for spring!

Decoupaged eggs

Are you ready to put all of the winter décor away and get your spring out?  Usually I am reluctant to let go of my winter décor, but this year?  I am so ready... maybe the last year has something to do with it, being at home all of the time.  I have been rummaging around the attic, my brain, and Amazon searching for an idea that would pop up in this brain of mine.

I have been wanting to work on another decoupage project, but did not want to do another vase... so I came up with eggs!  Easter is around the corner and I decided a twist on the common decoupage egg display would be fun to do, and guess what, easy too!

Remember yesterday when I said I had a teacher in junior high who had an impact on my creativity?  For years I did not think I was a creative person, and I did not even try after the teacher wrote "This sucks!" on my art project.  I remember the project quite well, we were required to work with clay.  I decided I was going to make a "do not disturb" sign for my bedroom door.  

I created a door and made a door knob that protruded from the door and made the words do not disturb out of clay.  I was actually proud of my project, I even made sure there were holes at the top so I could string ribbon through it and hang it on my door.  When it was returned to me with this sucks!  I did not even bring it home with me, I threw it in the trash and decided my art days were over.  I never signed up for another art class again.

Fast forward to adulthood, I worked with children with disabilities in the classroom for several years.  I had to go to art class with them.  Imagine my hesitance to want to attend a class where they were going to need assistance and I felt like I would not be able to help.  Those years working with the kids are a very fond memory for me.  I loved working with them and Ms. Vivian Rowntree, the art teacher.  Believe it or not, she taught me a lot and I got my confidence back!  Writing this, I searched for Vivian and found she passed away last year.  Made me sad, I had wanted to share with her that I have found decorating to be my form of art and haven.  

In my endeavor to getting creative, I started small by making Christmas presents for my family.  I wasn't sure if my ideas would work out or if I would be embarrassed to give them.  That year at Christmas, I held my breath while my family started opening their presents.  When I said I made them, they were surprised and said they loved what I had made.  That helped in sparking more creativity.  

I started to decorate my apartment and the ideas and creativity kept flowing.  I started looking at items and seeing something new and so I would repurpose items, this was kind of before everyone else was doing it.  You could still walk into a thrift store or antique store and get items for a steal.  

It is unfortunate I lost out on all of those years of using my creativity to express myself... who knows what I would have done had it been different, but here I am, loving the décor of the past... The Gothic Period was rebellious, spiral turned legs, stained glass with roses, then The Victorian Period where homes were seen as being eclectic, dark and moody colors, Art Deco followed where black and white and chrome came to the forefront, geometric shapes... the different periods go on, but these three inspire me.  

Art Deco is a little modern for me at times, it really depends on the piece.  I am drawn to items for different reasons... Cape Cod Style is another favorite with the wide wood plank floors, white paint everywhere, shutters, dormers... I think it is what led me to the home we have.  

And now that we have had an art lesson in memory of Vivian Rose Rowntree, I will show you the simple spring egg project I came up with.  Seems to be a let down after discussing all of these different periods in time, but I got a little off topic thinking of Vivian.  I thank her for her kindness, the lessons she taught and how she impacted me and the children she worked with.  I know the children I worked with looked forward to her class, and you know what?  I loved her class too.

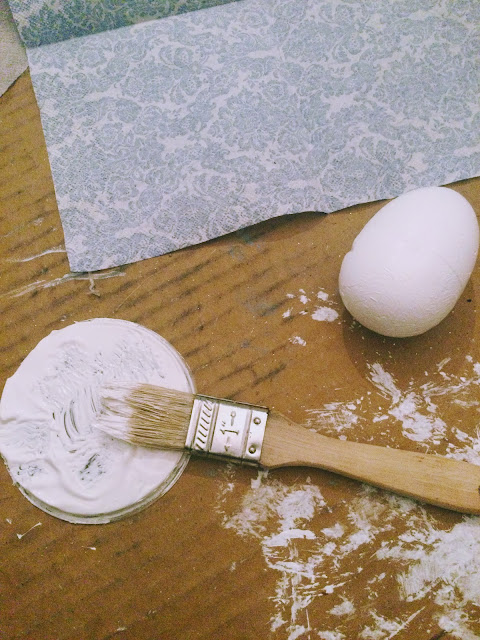
Paint brush with gesso paint and napkin

I enlisted the help of Mr. Vintage on this project.  I started with styrofoam eggs (found here), gesso paint (found here), a paint brush, and paper napkins (found here).  I do love using these paper napkins for projects.

Painting egg

Mr. Vintage saw my struggle with painting these slippery little suckers and suggested using an awl tool (found here) to skewer the egg so I could paint them.  This was an awesome idea!

5 painted eggs

Keeping to my odd numbers, I decided to work with five eggs.  Here they are all drying from the gesso paint application.  

Decoupaging eggs

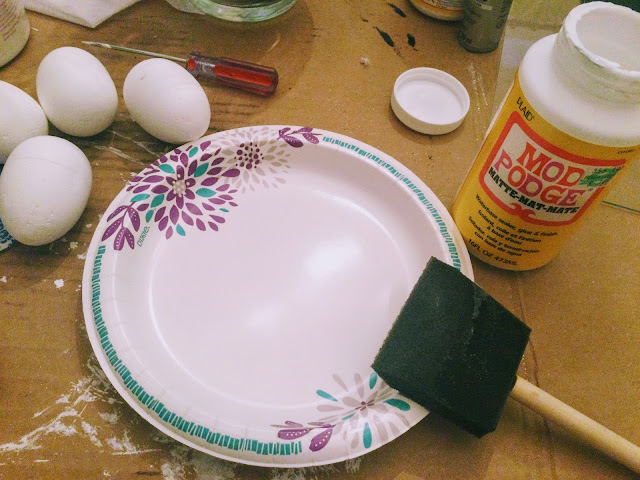
I got out the trusty Mod Podge (found here) and sponge brush (found here) to brush the Mod Podge onto the egg.  If you plan to do several decoupaging projects, I suggest purchasing multiple sponge brushes.  You cannot get the glue out of them after you use it so it is best to dispose of after use.  I tried cleaning the last one I used with soap and water and it is hard as a rock.

Decoupaging eggs with decorative napkins

We learned later using the same concept of using the awl tool worked out pretty well while applying the Mod Podge and napkin pieces.  Trial and error here... we work as we go, we never know if my hare brain ideas will actually work until we try. 

Decoupaged egg

See, we get smarter the further into a project we get.  Mr. Vintage suggests cutting the paper napkins versus tearing them.  He said it provides a cleaner look. 

How to decoupage an egg

First one done, four more to go...

decoupaged eggs in blue and white

They are finally complete and dry!  Now to style them, and I do intend to make it fancy pants... 

Do you recall my glass vase with the diamonds with the winter décor in it?  If not, you can read about it here.  I decided to give it a new look for this project.  

decoupaged eggs styled in a vase with diamonds

I removed the ornament and cedar from it and decided to leave the diamonds.  If you would like to use these for your own fancy pants project, you can find them here.  We used them at our wedding reception and I am always finding new ways to use them in our home.  

I placed the eggs down in the diamonds and then added a small candle, you may be asking yourself why I would add the candle, just wait...

decoupaged eggs in vase with diamond sparkle

Another view of the eggs, diamonds, and lonely candle.

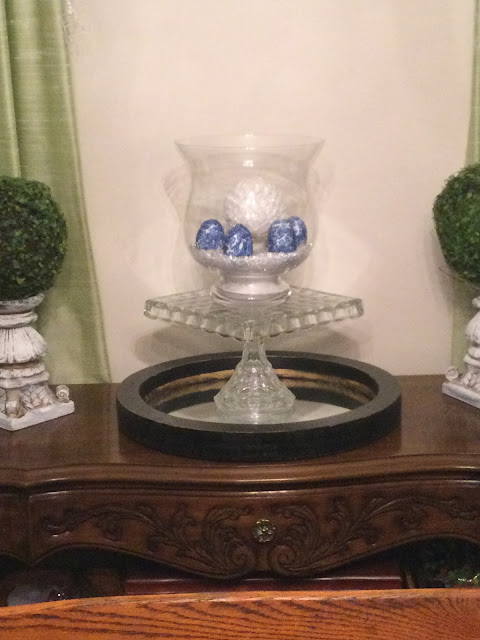
decoupage eggs in vase on top of mirror server

I needed a little pedestal, for you guessed it, another Christmas ornament!  It adds sparkle and dresses up the vase with the eggs inside. Do you know I also used these ornaments at our wedding reception and I use them on our mantel at Christmas too?  If you missed the Christmas mantel you can find it here

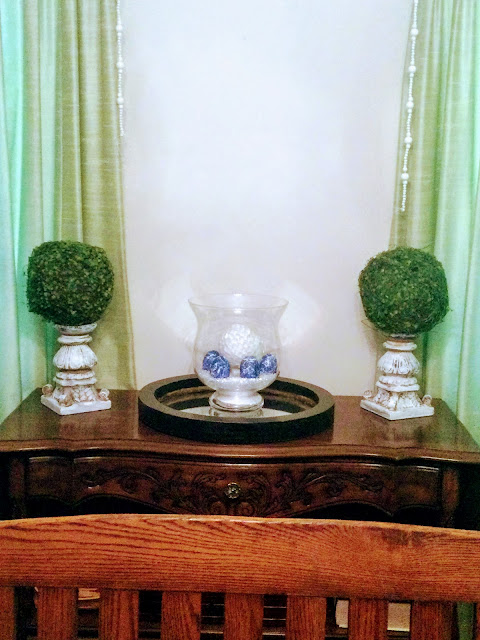
How to decorate your dining room with boxwoods

I left the $5.00 mirror on our buffet.  You can ready the story about it here.  I also added my lovely candlesticks that seem to make their way around this dining room in many different ways.  

I also added boxwood balls to the candlesticks.  I found some at a pretty good price for you here.  Mine are 9 inches and so are the ones I have provided a link to.  I also found some comparable candlesticks here and here.   

boxwood with decoupaged eggs

A closer view of the candlestick and boxwood ball.  I was happy to bring in a little greenery into the dining room today.  It was the kick in the pants I needed to keep going so I am hoping to share more spring with you next week.  

Styled boxwoods

Remember, you can remake anything you have around the house too.  These candlesticks did not look like this when I purchased them.  They were on clearance at Hobby Lobby with broken scrolls on one side of each of them.  I thought it added character and then I added the white paint by dry brushing it on.  I love them as is and they find their way into every season... 

How to style your buffet

What do you think about the eggs?  I think they turned out pretty cute.  Give a shout out to Mr. Vintage for making them for me.  He was supposed to be helping, but then took over.  I graciously let him.  😉

How to decorate your server in the dinging room

How to elevate a vase with a pedestal

How to Make Easy Chinoiserie Blue and White Easter Eggs

How to style Chinoiserie Blue and White Easter Eggs

How to elevate your spring decor

How to add character to your dining room


Our first spring craft together, I do love a good crafting project.  How about you?  Do you like to work on projects around your home, or do you like to purchase items already made?  I would love to hear about upcoming projects you have planned!

disclosure: this link contains affiliate links 


Would you like to comment?

Comments