
Searching for how to make Christmas ornaments from paper? We are excited to show you our DIY Christmas ornaments from paper.
Making Christmas decorations from paper can be messy, but a lot of fun. DIY Christmas ornaments are so easy to make. These DIY Christmas decorations easy will be the talk of your holidays.
Do you ever have those leftover paper napkins from Christmas' past, and wonder what can I do with them? I mean, if you are anything like my mother, then you want ALL matching napkins every year, but when you have a smaller family, there are always a few left over. They begin to pile up and you have those stragglers that say hey, I want to be of use somehow around this house too! You may be thinking to yourself who cares? So I have a few extra napkins, but I think opportunity!
Call me crazy, but I was thinking about Christmas ornaments before July. I had this idea and thought oh, I need to make this happen! So, way back when, I made the first ornament.
Last year when I first shared this post, I did purchase napkins because I wanted dogs on our trees. Have you ever noticed when the masses, and when I say this, I mean the retail stores and online shops, get wind you want something then the prices seems to increase? Well darn them, I will go around them... and I will show you how I created more ornaments this year so I could show you how to use the leftovers!
After a few decoupage stunts, I realized the price of napkins were on the rise. What else is new, huh? You would think I covered a wall with napkins, oh wait, I did!
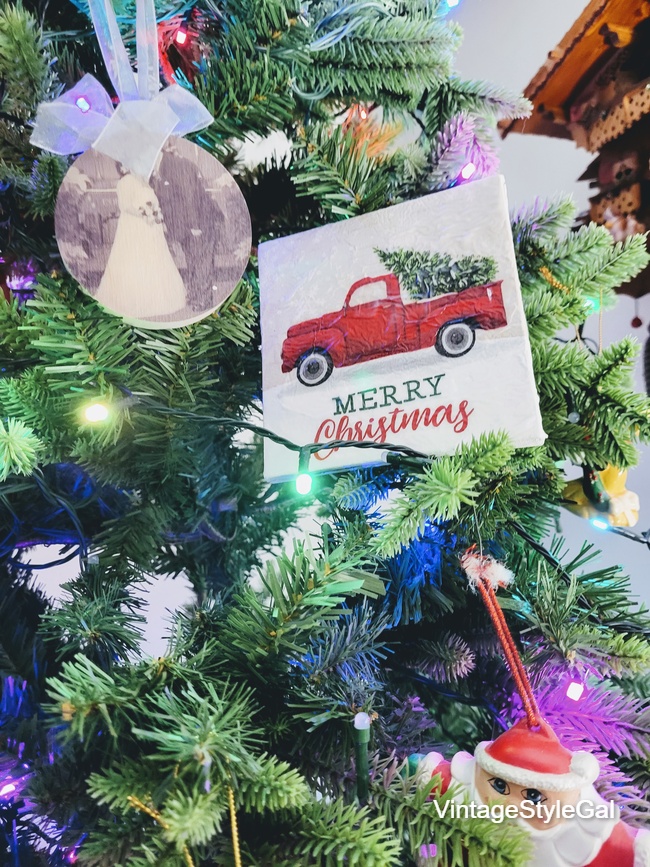
Well, what does a gal do when the price goes up? Well, I start rummaging around in my stashes throughout the house and I begin searching for items I already have. I came across my beloved old red Ford truck paper napkins and decided I needed to create a few more ornaments for our tree using the same approach as I did last year.

What you will need:
- Paper napkins of your choosing
- 5x5 canvases
- Twine
- Hot glue gun
- Hot glue
- Mod Podge
- Scissors


- Separate paper napkin plies, you will only want one ply to apply to your "ornament"
- Cut napkin down to size (5x5 to fit the canvas)
- Apply Mod Podge to the canvas with your finger (I tried many different approaches, and this was what worked best for me)
- Carefully apply napkin to canvas, begin by lining up the bottom of your napkin to the bottom of the canvas and work your way up to the top
- Pat the napkin vey carefully, do not pull on it at all, it WILL tear
- Let dry for about 15 minutes, but only if you appreciate the crinkle look to your work of art
- Apply another layer of Mod Podge over the top of the napkin to protect the top layer from tearing over years of use
- If you prefer a smooth look, go ahead and apply the top layer of Mod Podge without drying, you need to be careful to prevent tearing of the napkin, then grab some saran wrap and smooth it over the top of the ornament, continue to smooth it until all of the wrinkles have been removed, remove saran wrap and discard, personally, I like the crinkles and think it adds character ❤


Now if you enjoy my stories and the entire process, you can read along for more below.
The more that I have made, the more I have learned of course, like anything really. You learn how to perfect things as you go. Since I did not inherit the painting skills in our family, I have to be creative in other ways. Mom and sis picked up the painting skills from my grandfather. Oh, how I wish I could paint! I would do it for hours and hours and hours...
Since I am certainly lacking in the painting department, I came up with this little idea. My first go at this, I picked up a pack of small 4x4 canvases. I thought this size would be the perfect ornament size for our family Christmas tree.
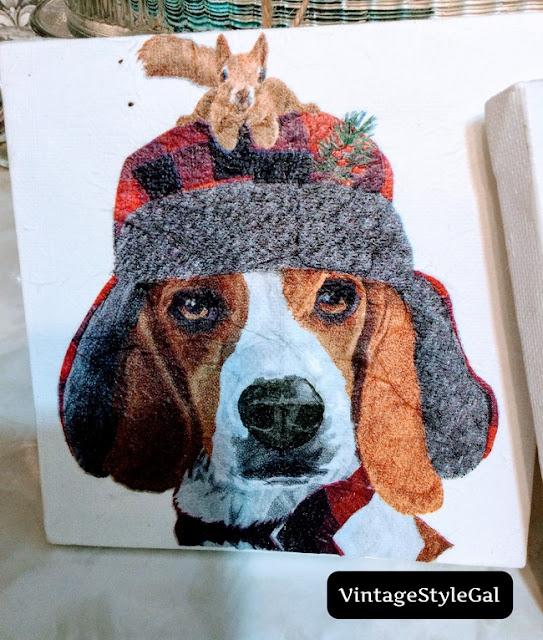
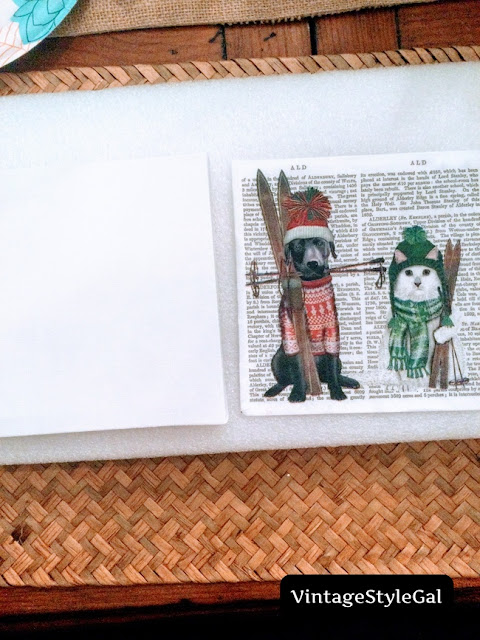
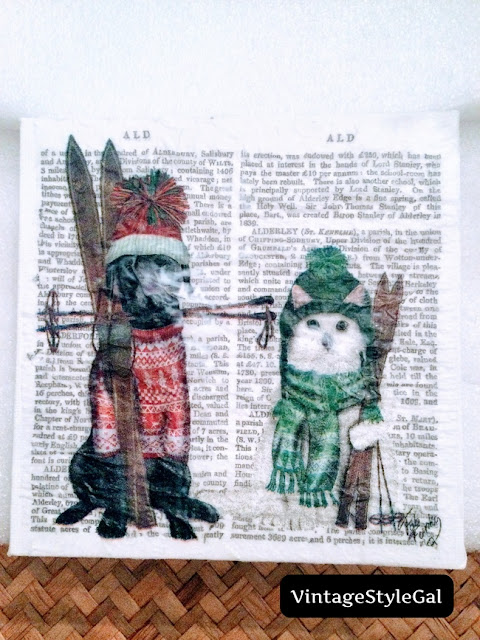
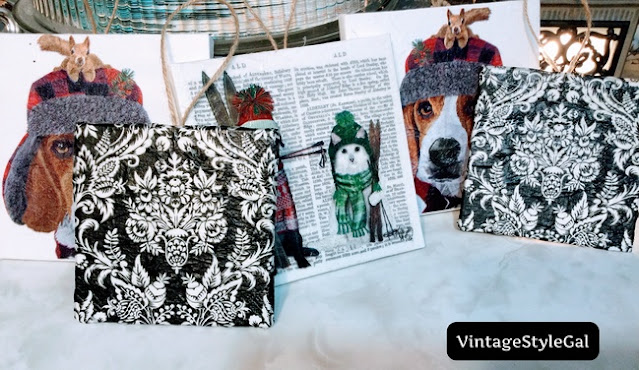
Then I picked up the cutest pup napkins! I found one with a Black Lab and Cat and then I found none other than a Regal Beagle which of course are no longer in stock. Darn it! We had to have a beagle gracing our tree with my stinker of a dog in mind... especially with our kiddo's nemesis, the squirrel atop his head. He is not a fan of the one who is always running around our yard, clicking his tail and getting ticked at Bentley for daring to exist!
Once the napkins came, I knew the 4x4 inch canvases would not work with the pup napkins I chose. I decided to order the next size up and go with a 5x5 canvas. This of course worked out perfectly with the napkins I chose. Don't worry, I still use the 4x4's, but a little differently as you will see below.
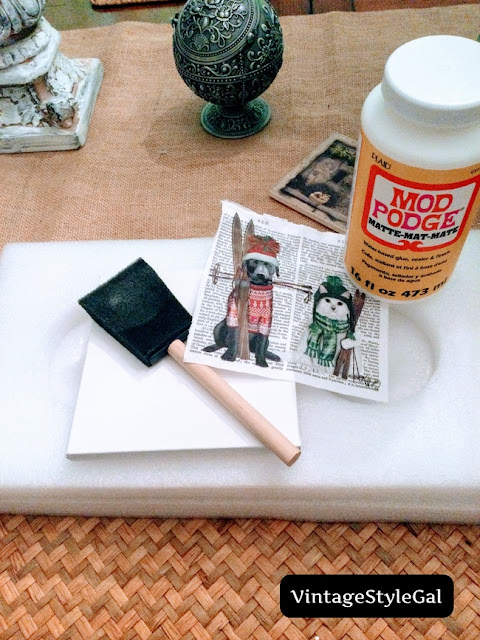
I will not share all of my trial runs at this (there were many)... what I found worked out best was to apply Mod Podge to the canvas with my finger. Yep, we are going way back to the elementary days.... good thing I did not mind getting glue all over my hands as much this time around...
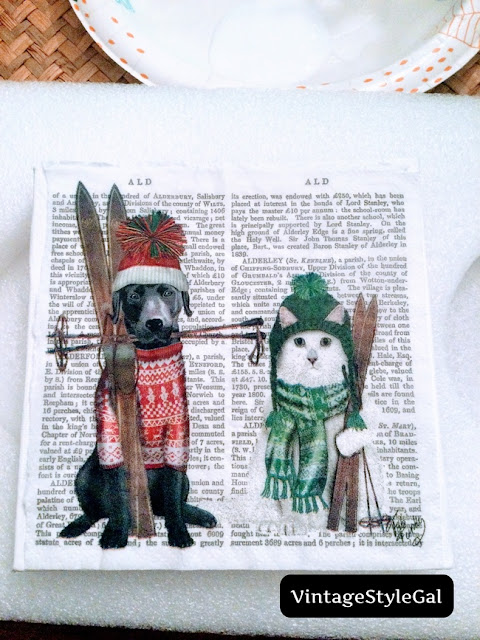
I applied the Mod Podge with my finger to the canvas and made sure to cover the entire canvas. I had already prepped my napkins by separating them, I found for this project the single ply worked best. I tried to leave two ply, and it bunched up on me more (these were 3 ply napkins).
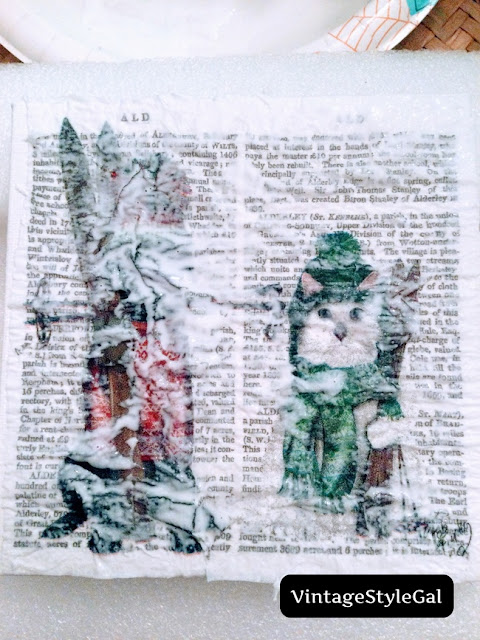
I patted the napkin down so it would absorb all of that lovely Mod Podge. Then since I have learned a thing or two, I did take a piece of saran wrap and placed it over the entire piece and smoothed out all of the crinkles in the napkin. I removed the saran wrap and then let them dry. I did not learn the saran wrap trick on the one I took of the in process photos.
Can you imagine an entire tree of pups? Oh that would be so much fun! I have not yet decided which tree these will go on yet. I am thinking our family tree which we put up in our tv room. We also have small trees for the dining room, a large tree in our living room, and a smallish tree in our bedroom... you get the idea. Christmas everywhere here.
Growing up, our family put the tree up the day after Thanksgiving every year. We had a tree in our family room with all of our ornaments given to us over the years.
Then our mother had a tree in her living room. She had painted Victorian doll heads, see talent there... me? Not so much! She even has Christmas carolers that she painted that are typically in her front window. Once upon a time, she painted ceramics quite often. She always had quite the talent in making those eyes look so realistic. I did get my love of decorating from her so I guess I inherited something. She said she is not as much into it as she has gotten older since it is a lot of work, but in her hey day? WOW is all I can say.
I have mentioned before, my grandparents began a tradition with the first grandchild in our family and began giving ornaments to each of us grandkids so once we were grown up, we would have enough for our own trees as adults. I love this family tradition and tell everyone I know about it so they can begin it with their families too.

I cherish each and every one of those ornaments. Once things get rolling around here, I will share with you my favorite ornaments, there are so many! I get so excited to see them every year and recall Christmas' past.
Are you getting excited for Christmas? I know we are! Our peanut is too! If you missed him getting excited when I turned on the Christmas music, you can read about it here.
Now you can see all of the variations I have been working on. I also tried a wax over the Lab and Cat, it made it so shiny the details were kind of hard to see so I decided against it for the rest.
I used a roll of twine, cut a piece, and used Mod Podge to twist the ends together once I made a loop, then I hot glued the twine to each ornament on the back. I am thinking the black and whites need a little glitter or something... we will see if I make changes before the tree is up.
Sometimes you just have to get in there and make mistakes and learn what works best. I seem to have no issue with that, and I do not mind sharing my fails. If we were not friends, then I may need to change my mind, but since we are, I do not care you see how often I seem to mess up around here. Tee hee... you live, you learn.


Your napkin ornaments are adorable and look wonderful on the trees! I too love beautiful napkins, but I use that top layer as "faux silk" on the fronts of my greeting cards. I love upcycling! Smiles, Linda at Paper Seedlings
ReplyDeleteThank you Linda. What a wonderful idea, you have such beautiful work.
DeleteThis is such a great idea! I love it! Thanks for sharing it with us!
ReplyDeleteThanks Charity! They are so easy, and I love those custom pieces for our home no else has.
DeleteI love finding ways to decorate on a budget! Such a cute project! 🙂 Thanks for the inspiration, Cara!
ReplyDeleteThese ornaments are so precious! I love the fact that they can double as coasters. Functional decor is fabulous!
ReplyDeleteThose turned out so pretty, I like them! Thanks so much for linking up at the Unlimited Link Party 95. Shared.
ReplyDeleteThank you, I enjoy putzing around with the items I already have and seeing what I can make.
Delete