
My mother has been cleaning out her garage and came across this lovely vintage spice rack that was my grandmother's. I believe she gifted it to my sister, which ended up in my mother's garage, and then ended up in my hands. My sis said if I have not missed something that has been in your garage in all of these years then throw it out, I do not need it.
What did my ears hear? I heard free... which is also my favorite kind of makeover project! Come on over, I will gobble those items up and give them all makeovers while helping you clean out the garage! I cannot say I have turned down free items very many times in my life, I guess it is an inherited trait.
Don't you love how things go around the circle in our family? All things lead to Cara... the discarded pieces no one else wants always end up in my willing hands. Is it no wonder our home is bursting at the seams?

Now you may be thinking: What can I do with an old spice rack? Give it a make over of course, that is my go to for most items around here. You can paint a spice rack, add stencils, decoupage paper, add transfers, so many things you can do with an old spice rack!
After sitting in my mother's garage for so many years, it needed a major cleaning, I clean my make over projects with bleach wipes, and/or Dawn dish soap. Dawn dish soap tends to really remove any grease that may have accumulated over time.

I thought those spice jar labels would be difficult to remove since I recall my grandmother having this hanging spice rack in her kitchen all of my life on the wall by her window, but they peeled right up, no problem at all. I put them into the dishwasher after a quick rinse, and I was quite pleased with how they turned out.
There are missing glass spice jars, but we can fix that, no problem. I always come up with a plan, and since Christmas is right around the corner, I decided our vintage spice rack with glass bottles would get a new look with a bit of Christmas flair.
Now you may be thinking to yourself, oh good grief, what is this woman up to? That's okay, I often wonder this same thing about myself... I never thought my ideas were that off the wall until one day my mom asked how exactly do you come up with some of these ideas?
I paused, and thought hmm... shouldn't she know? She did of course influence my love for decorating, or at least I thought so. I guess I am not sure? Things just come to me as I ponder a piece, and I see it in a new light in my mind. So, there you go, the best explanation I can come up with on how some things come to be in our home.

I spray painted the spice rack white since I thought it would give it the smooth look I was wanting... only guess what? That paint would not adhere in certain areas as you can see! I sanded it down and started again... nope. This vintage little gal was not having it.
I thought what is a gal to do? Well, my thoughts are usually to embrace whatever hiccup I am experiencing, so that is what I did. I did mention I went traditional this year for Christmas in certain rooms, and that would include our kitchen. I knew just the trick... and ran off to my still organized closet to check out my supplies on hand.
Turns out, I still had a red & white gift wrapping paper roll, and I decided why not add wrapping paper to cover this lovely? I measured the back wall of the spice rack and got right to work in measuring out my wrapping paper and cutting to the specific sizes I needed for the areas that would not accept the white paint.
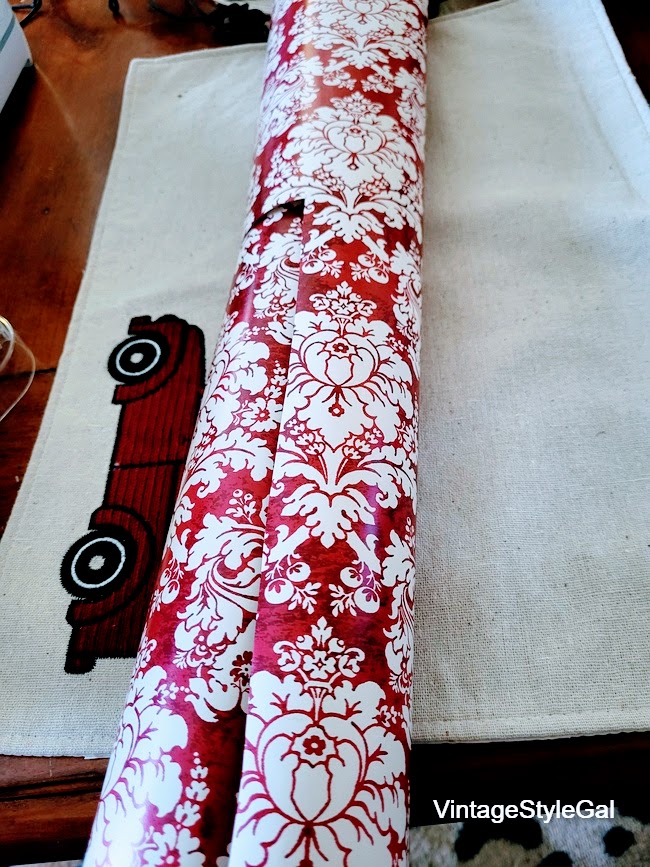
I decided to use a double sided tape to cover the back of our spice rack to adhere the paper to. I am not exactly sure red and white will always be something I will like in our kitchen, but it will definitely work for our Christmas kitchen.
If I were to keep the red and white, then I would decoupage the wrapping paper to the back of my spice rack, but since I am undecided, I went with the double sided tape. Some days projects are permanent, and others they are temporary. Do you know sometimes those temporary projects become permanent?


I then decided to bring out my ole' friend Cricut. I dusted it off since I had not used it since last year when I made the ornaments and our reindeer picture. I know, what a waste... I am trying to work on expanding my crafting skills to include this Cricut now so go easy on me.
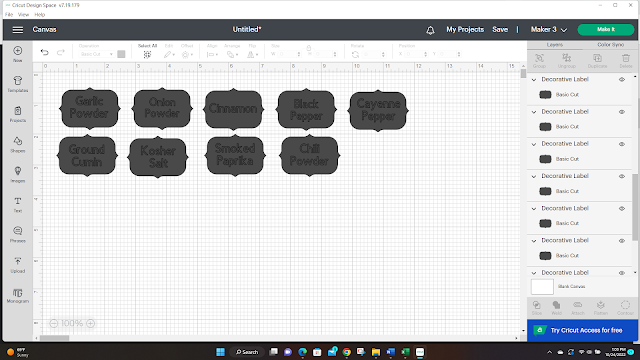
After the Cricut downloaded the latest and greatest software, I opened my design space and created 1 inch by 1 inch spice labels... only Cricut did not like the idea of 1x1 labels, it kept trying to set them at 1 1/2 x 3 inch labels. As you can see the spice jars are teeny tiny and 3 inches was not going to cut it.
I kept working with it, and felt like I finally had what I needed. When I went to print, it asked me to check out. I could not figure out why though since I knew I had used free labels and font for these spice jars. Call me cheap, but I refuse to pay for things I know I can get for free. I used a basic font, I am not sure what I did wrong?
When hubby came home, I asked him to take a look at it. He sat down and recreated the labels, and no checkout prompt was requested for him. How strange, right? Oh, I am sure I did something incorrect, what that was? Who knows?
Then came the part where he had to "attach" the label to the printed font words, he did this with a little work and finally had everything attached and ready to print. When he printed the labels, everything printed fine. Then came the part where we loaded the vinyl incorrectly... are you laughing to yourself yet?
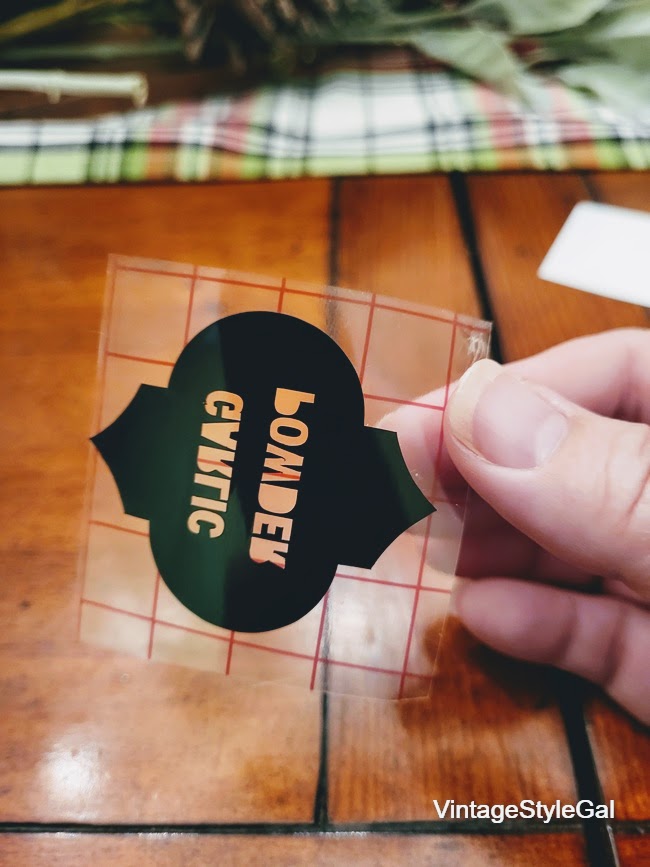
I know I was giggling because this guy was finally getting irritated. You know, the place where I had been earlier in the day when I wanted to chuck it out the window. So we added a new piece of vinyl, and it cut the vinyl again... all of the other sheets in the package I purchased were shiny so we assumed the black vinyl was also shiny. Nope... back to the drawing board... take 2.
So we finally have labels cut on the correct side, and begin applying transfer tape to the sheet and pulling away so we can apply each label to the jars. Guess what the next stumble was. The transfer tape did not work. At this point, it is getting late on a "school" night, and he had to get up early for work so we stashed it away for later.
I went back to it in the morning, and I decided Cricut did not like the size of my project. So, I did the only other logical thing I could think of, I increased the size of my labels. After several fails, I moved on to something else.
After this project sat for a while, I finally finished it up last week, can you believe it took me that long to complete the spice jars? I know, sometimes I am slow, especially when projects do not go as I anticipate them to go.
Last week I said to myself, you ARE getting this off your list of things to do. I am sure you have seen some pics from the kitchen with this lovely spice rack half completed in the background. When I get stuck, it is just best for me to move on because I will only make things worse. I need a fresh mind so I can go back and finish something when I’m ready.
Only this project took several attempts, and possibly months. I will say the months was in part because I just pushed it to the side every time I thought about it and said I will come back to it. Not my usual way of doing things because I like to get the hard things out of the way first.


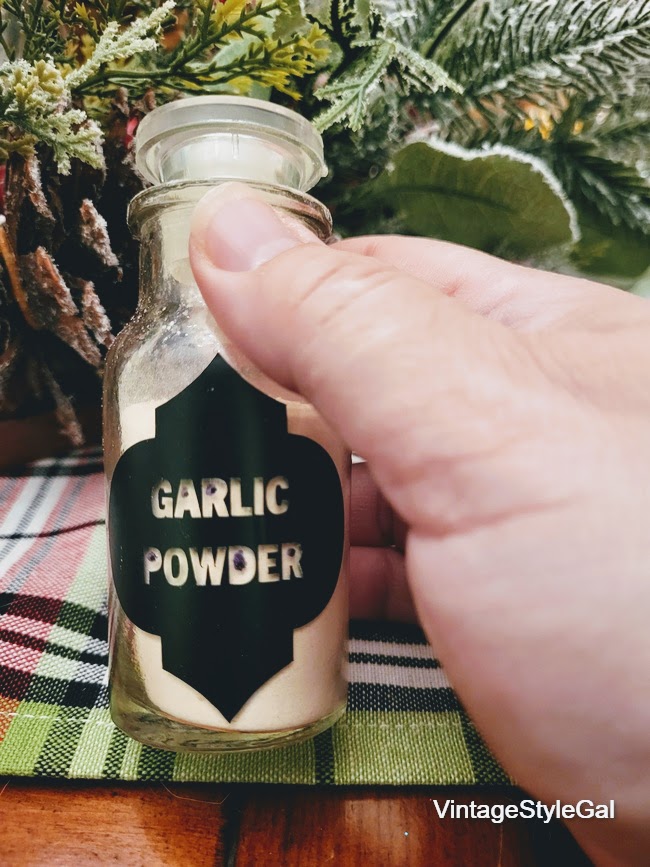
I pressed the vinyl into place on my spice jar and said whew, that is completed. Now if I had not wasted a few months stewing on this project I would have probably continued to work on it to make it right because I tend to be a perfectionist, but I decided these are spice jars, and who cares?

Then did you see my "fix" for the missing parts of my letters? Yes, I sure did bring out a handy dandy sharpie marker and added them in. Yes, sometimes I laugh at myself, it is okay if you do as well.
Some days things just do not work out as we envision them, and you know what? That is perfectly okay. In my opinion, this is called life for a reason, things do not always go as perfectly as we see them in our mind some days, and you just either let it bother you, or go with it. I decided to go with it.

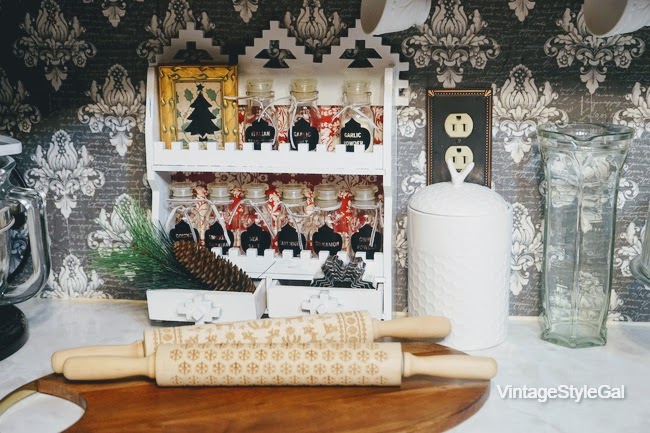

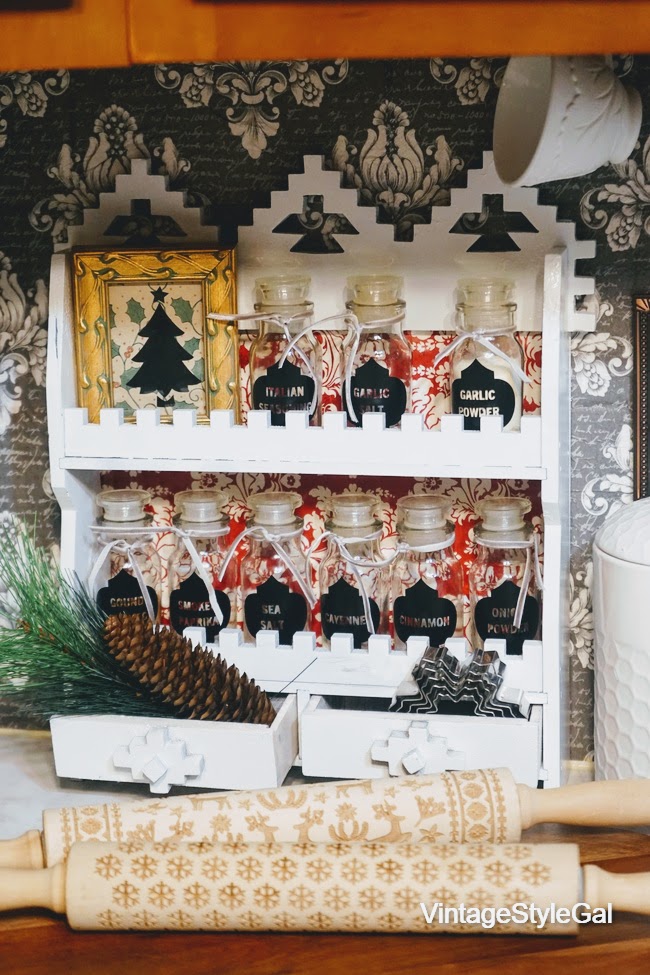
I also decided to add gray velvet ribbon to each spice jar for just a little bit of "more" that I like to do around here. The pinecone came from my mother's backyard, I have so many of them, and have been adding them to our Christmas decor all around our home. I also have so many sprigs of pine I have picked up over the years I thought was adorable in the drawer of our spice rack.
There are those cookie cutters that we used for our Christmas cookie trees too in our vintage spice rack with drawers!
You may also wonder:
What should be in your spice rack?
- I added spices that I use most to this spice rack makeover: Cinnamon, Ground Nutmeg, Sea Salt, Garlic Powder, Garlic Salt, Cayenne Pepper, Everything Bagel, Smoked Paprika, Italian Seasoning, and Onion Powder
- I am not one to follow directions much when it comes to things like this. Personally, I think you should add what you use most, and that is exactly what I did.
- Make the kitchen easy to navigate for you, if you are the one cooking, that is the way it should be.
- Having a spice rack was my answer to keeping spices tidy in our kitchen.
- Prior to this spice rack vintage showing up, I had a spice rack drawer. I would need to pull each one out and hope it was the one I was searching for, otherwise I had to go through the entire drawer searching for one spice, not fun.
- Having a vintage spice rack with drawers where I can see all of the labels of the spices I use most is a time saver for me.
- Again, I am not one to follow mainstream in most anything in life, and I do what works best for me.
- Since I like everything cutesy, I added the labels and velvet ribbon to our spice jars, and then a cute little picture for Christmas flair in our vintage kitchen.
- A small funnel is the best way
- LOL, I could not find my small funnels, so I actually filled these spice jars by grabbing a 1/2 teaspoon, and pulling spices from the store bought spice jar and then dumping into my vintage glass spice jars. Gotta love those vintage vibes, have you noticed most things were so much smaller then than they are now?
- In my opinion, yes, spice racks are worth it, but you do not need to go out and pick one up brand new.
- Personalizing a spice rack will allow you to purchase the spices you use regularly.
- Take a look at the thrift store, antique market, yard sales, ask a family member if they plan to upgrade their spice rack and you may be able to score one for free like I did.
- You can find spice racks on Amazon too, perfect Christmas gift for the cook in your family. They vary in pricing from very inexpensive to a lavish gift.
- I also created a spice rack many years ago from a desktop wicker stand, and purchased small jars that I labeled with the spices I used most often. Make your own! You will love it that much more.
- I added the wrapping paper for Christmas, but I have considered decoupaging what is currently on our backsplash on the back of this spice rack. The more we get into designing our kitchen, the more I am realizing our backsplash will not be in the same place when we remodel. Everything will be changing... eventually.
- Decoupage a spice rack, you can use double sided tape like I did, you can paint it and then stencil on the back plate of the spice rack.
- I may even decide to remove the castle like pattern of the wood at a later date, I am just not sure until I see how this kitchen is going to come together.
Are you ready to see bits of Christmas in our kitchen?


I used the same wreaths on our kitchen cabinet doors this year as I did last year, and even the same ribbon. I loved that plaid and really felt like it made the wreaths pop! I added some bells to the cabinet door, and they jingle every time I open the door.
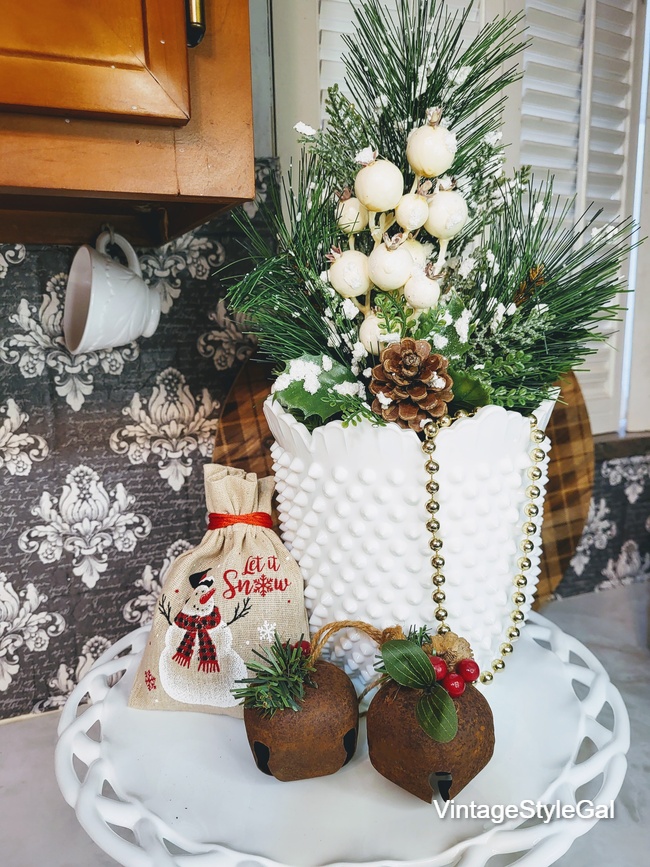
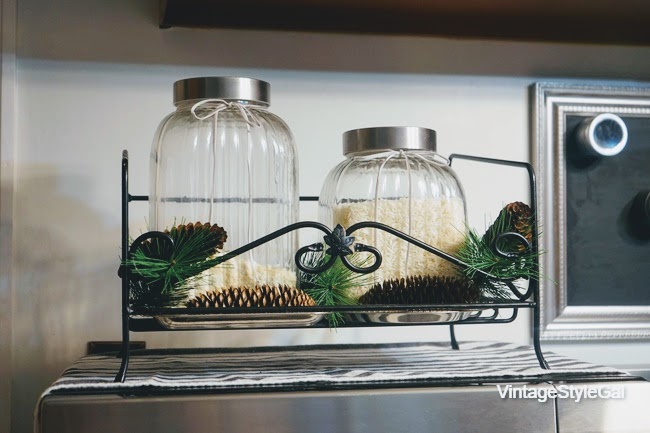
I enjoy creating these small vignettes in our home, especially in the kitchen. I used a milk glass cake plate, milk glass hobnail cookie jar, removed the lid, and added a few sprigs of pine, gold beads from the tree, a pine spray, snowman bag, and those rusty bells I so love. Let it all sit on the counter, and there you go, easy Christmas decorating at it's best. The best part, no fussing, and if you wanted, you could leave it at that! PLUS... it can stay until winter is over!

I am so happy we decided to use the sheet metal used on radiator covers in our kitchen. It is an economical fix for outdated sheets of plastic they loved to use in kitchen cupboards. I also love the way our mercury glass cabinet drawer pulls look with the metal. Some days I would love it if the Christmas decorations stayed up all year long!

These Dollar Tree silver tinsel wreaths got a bit of a make over with adding small red ribbons, and of course, that plaid I love and have throughout our kitchen on our built in.
Do you see how we added the sheet metal to our built in again? I love that we made this built in ourselves, and reimagined wasted space in our kitchen from the plate rack. I loved it, but we needed more storage space, and since the rest of our 1950’s kitchen had been removed, I decided it was okay to do it here too.
I am happy we were able to recycle the trim from around our plate rack into a coat and hat rack, and another surprise we shared earlier this year too. You may be surprised what you can do with old trim pieces.


Just perfect for Christmas, I like the redo! Thanks so much for linking up at A Themed Linkup 134 for All Things Christmas. Shared.
ReplyDeleteThank you Dee! I love making over vintage items.
DeleteOh my gosh. I know it took you a lot longer than you anticipated to complete this project but it turned out SO good! The rack looks so much better white and I love the red and white pattern you put in the back. Thanks for inspiring us.
ReplyDeleteThank you so much Anna! I was frustrated, but in the end I love it now! I am thinking the red & white may stay in our kitchen, I really like it!
Deletelove the spice rack. patient is hard. You did a great job
ReplyDeleteI love the paper you added to the back of the spice rack! Great save using the sharpie marker! It turned out great!
ReplyDeleteOMG I love everything about this spice rack makeover. Thanks for sharing this project, Charity! So Cute!
ReplyDeleteThanks Meredith, I loved that it was my grandparents and I was able to give it new life.
Delete