
From Windchime to Mini Planters: Transforming Dollar Tree Delights into Planters
Discover how to give a Dollar Tree wind chime a creative makeover by transforming it into a stunning planter. Remove the bell, paint it to match your style, and turn it upside down for a unique centerpiece. Get inspired and bring new life to your space with this budget-friendly DIY project.

First glance, I did not notice Dollar Tree was calling it a windchime. I thought oh, how cute, I can put that on my front doorknob to play up our octopus rug in the foyer and create an ocean theme to welcome guests.
I hung the cutie on the doorknob and walked away. You would know a certain pup around here would be nosing around and I heard a loud clank! After some investigation, I actually looked a bit closer at our "windchime" and thought, actually, this could be a really cute mini/herb planter! It appeared to be made from terra cotta so I picked up two more and went right to work in creating mini planters for our dining room buffet.
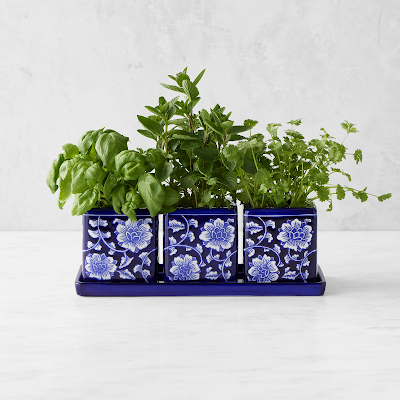
I thought three would be perfect after seeing this herb planter set from Williams Sonoma. Initially, I thought I would decoupage it with napkins, but then I decided why not try something new? Or how about new to me anyway since I find I sometimes decoupage many things around here.

Below are the items you will need to create mini pots for your home. You can choose to create one pot, or as many as you would like. I find items in sets of three aesthetically pleasing to the eye.

Materials Needed:
- Dollar Tree windchime
- Paint
- Paint Brush
- Glass Beads or Marbles
- Herb planter tray

I untied the knot at the top and then was able to pull the nautical rope and bell through the bottom of our windchime. I set it aside since I have plans for it on another project. I really do not like to throw anything away since you never know what else you can come up with!

Are you seeing the vision here? Herb pot or mini planters here we come!

I began painting these mini pots with white paint. I was lucky to find my white paint had excellent coverage, and covered up the decals and designs quite nicely.

The hard part for me is the waiting. I did paint two coats on each pot, letting them fully dry between each coat. The above photo is one coat.

Dollar Tree has these lovely trays that come in silver. In retrospect, I think I would have left it silver, but I thought since I was on a roll painting, I decided to also paint the tray white. We know I rarely paint anything so I was stepping outside my norm. I distressed the tray to give it a "I've lived a good life" look to it.

For the July 4th holiday, I picked up red, white, and blue flowers. A rarity for me since I much prefer actual colors I can find in nature for our home, but I was getting in theme for the holiday and went with them.
The flowers looked a bit sad in our pots, so I went to my stash and found styrofoam eggs that fit down in my pots perfectly. I pressed the stems of the flowers down into the egg, and then placed each egg into the planters. I also filled in and covered the eggs with Spanish moss.

In case you really want to use these as herb planters, there is already a hole in the bottom for drainage. I thought a small herb garden in the kitchen would be a cute idea.

Our buffet is all ready for the holidays now, decked out in red, white, and blue, stars, and stripes. A vintage camera perched on our buffet with me wondering how many holidays has it seen? What photos has it taken? How many fireworks has it enjoyed? Do you think of these things, or am I just an oddball when it comes to my vintage treasures?

I pulled out more vintage finds, and black and white photos, my favorite! How do you decorate for the Fourth of July? I've never really decorated for summer month holidays, but I did enjoy working on this Dollar Tree makeover project. Do you know I already have a makeover in mind for these pots after the holiday? Yes siree, I will be ready for a new look very soon, so stay tuned for more ideas.
Dollar Tree has so many goodies just waiting to be made over. I like to look at their site to get an idea of what I can possibly make over. Having a plan helps keep me from overbuying and also buying items I am not really sure what to do with. Do you enjoy a good Dollar Tree makeover like myself?

Ciao,
Cara
Don't forget to Pin!


What a great project Cara, love the patriot vibe you have going on.
ReplyDeleteSo glad you liked it. Dollar Tree items are perfect to give makeovers to since they are budget friendly and easy to work with.
DeleteHello my friend! You know I love a good Dollar Tree DIY! So cute and festive!
ReplyDeleteThank you Donna, I am always in love with your Dollar Tree ideas! I never paint, but I have to admit, I had a little fun with this one.
DeleteOh, very creative, I like how they turned out! Thanks so much for linking up at #AThemedLinkup 153 for Summer Crafts and Décor! Pinned.
ReplyDeleteThank you Dee, I thought about decoupaging them, but I tend to lean in that direction often so I decided I needed to experiment with paint.
DeleteIt's a very cute upcycle - it looks great on your table. Pinned.
ReplyDeleteThank you so much Carol, I am not usually one to paint, but I decided to give something new a try and I had a lot of fun with this project.
DeleteThese came out so cute Cara! Great vision my friend, I love up cycling dollar tree items myself. I have to admit I'm the one who takes home a bunch of stuff and then doesn't promptly follow through with said projects so I'm going to follow your advice. Thanks for sharing your lovely pot trio at the Home Imagined link party. And that camera is fab btw! 🤩. have great day! XO- MaryJo
ReplyDeleteThank you MaryJo! I had to buckle down, if you saw our basement, you would know why! I have so many things down there just waiting for a makeover so I am trying to work on those things before I make any more new purchases. I began searching their site and then going in with a plan to prevent me from bringing home bags of things I wasn't exactly sure what to do with. On occasion, I still pick up things, but I have scaled way back!
DeleteCONGRATS Cara! Your post is FEATURED at #AThemedLinkup 154 for All Things American and Patriotic from the previous linkup for Summer Crafts and Décor!
ReplyDeleteThank you so much Dee! That was me stepping outside my comfort zone and painting, it was fun for me to put together.
Delete