Upcycling Embroidery Hoops for a Whimsical Spring Craft
Join me in the enchanting world of upcycling with our latest blog post! Discover how discarded embroidery hoops found new life in a spring-inspired craft. Follow along as we share creative insights, from unexpected transformations to the joy of rub-on transfers.
I may sometimes use affiliate links, which means a small commission is earned if you make a purchase via the link. The price will be the same whether you use the affiliate link or go directly to the vendor’s website using a non-affiliate link.
Perhaps it's the inevitable shift that comes with age, a broadening of horizons that turns us into perpetual students of life. 😉 I like to believe that with each passing year, I've gained a bit more wisdom. How about you?
With Spring and Easter nipping at my heels, I knew spring crafts would get me in the mood while turning a blind eye to the melancholic rain outside my window. As I pondered spring crafts over a cup of green tea, I decided to incorporate our spring rub-on transfers—adding a touch of whimsy with bunnies, butterflies, and flowers, of course.
Now, let's dive into this delightful, and might I add nature-inspired springtime craft!
Material List:
- Spring Rub on Transfers- These little beauties are like temporary tattoos for your crafts. Pick your favorites, the possibilities are endless!
- Scrap fabric - Don't let those fabric orphans languish in your craft stash! Give them a new lease on life.
- 8 inch embroidery hoop and/or oval embroidery hoop - These will be the frames for your springtime masterpieces.
- Chiffon Ribbon - Because a touch of elegance never hurt anyone.
- Scissors - For the inevitable cuts we will be making
Instructions:
- Pull out any scrap fabric you would like to use up around your home. I used the cotton liner from our No Sew Pillows from several years ago.
- Roughly cut the fabric to a size slightly larger than your embroidery hoop. Don't worry about precision, we'll trim the excess later.
- Iron fabric to ensure it is wrinkle free so you can apply the transfer smoothly
- Choose rub on transfers you would like to use. I used two rub on transfers for each embroidery hoop I decorated.
- Once your fabric has been ironed, and is wrinkle free, place rub on transfers onto to fabric to get a feel for spacing
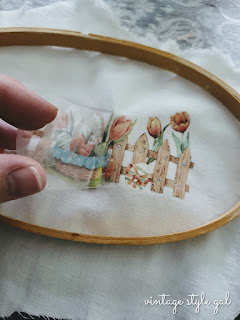
- Remove backing of rub-on-transfer and apply to fabric by rubbing the transfer onto the fabric. I could not locate my tool so I used the handle of the scissors I was using. Yep, we improvise when need be.
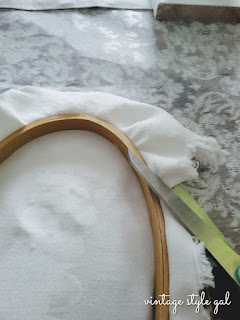
- Trim fabric close to the embroidery hoop for a more finished look.
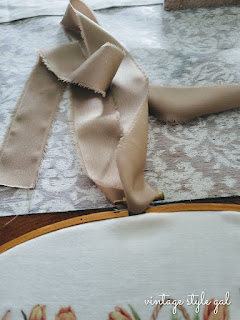
- Thread chiffon ribbon through the top of the embroidery hoop, tie off with a bow or simple knot.
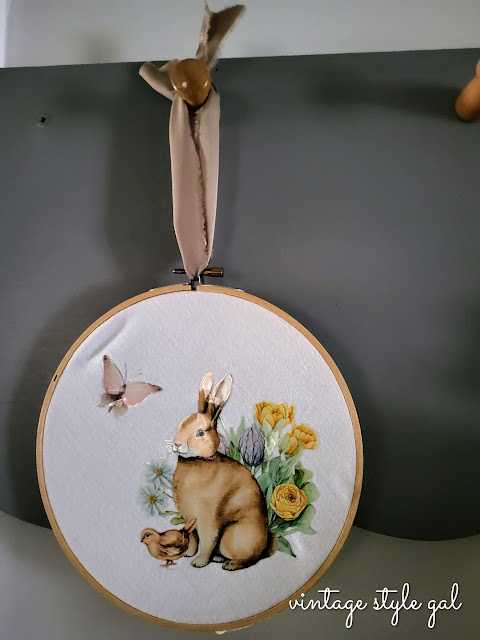
- Hang, and enjoy!
During the auction for my grandmother, I was astounded by what the auctioneer labeled as the "trash pile." I was determined not to let the majority of it end up going to waste. With three days to clear the property for the new owners, I diligently piled those treasures into my car—one by one.
Both of these embroidery hoops found their way into the discard pile. I know, I was just as shocked as you are! Who throws those away? Certainly not me. I saw the potential to breathe new life into them through an upcycling project.
While Grandma, a quilter and sewer, used these hoops for their intended purpose, my crafter's eye envisioned a different potential. Do you ever look at an item and see it differently in your mind's eye? I often do, and that's where many of my upcycling ideas originate. I believe Grandma would approve; in fact, she might just receive one of these precious bunnies for her 101st Easter this year.
As I embarked on this embroidery hoop craft, I hadn't initially planned to use the fencing with the eggs and tulips. I had reserved that precious lamb rub-on-transfer for a specific purpose. However, while taking the photo, I noticed the fence looked quite nice framed by the embroidery hoop, and so a new plan emerged. Don't you love it when things turn out even better than planned?
The bunny looked perfectly at home in the scene. I imagined him sneaking bites of those tulips, just as they do in our own yard. This marks the first year without our hedge of bushes, where rabbits typically have their babies since we moved here. It's also the first spring with our completely enclosed yard, leaving me curious about where their new home will be.
Through the rub-on-transfers challenge I set for myself, I've learned a great deal about them. Applying them to fabric is a breeze, thanks to the substantial backing. Terra cotta pots, with their porous surfaces, also make for easy application. Interestingly, the only challenge I've encountered is applying rub-on transfers to paper.
I love the way rub-on transfers elevate my crafting projects, and given their simplicity, it's a no-brainer for me to use them. In this project, adding several rub-on transfers brought that extra something, something—I'm sure you know what I mean.
Have you ever used rub-on transfer stickers in your crafts? If so, share your experience with us. Happy crafting, my friends, and may you thoroughly enjoy the arrival of spring.
I have included a source list for your convenience of items I have used for this spring craft, along with other supplies you may need.
Source List:
- Spring Rub on Transfers - Amazon
- 8 inch embroidery hoop - Amazon
- Oval embroidery hoop - Amazon
- Chiffon Ribbon - Amazon
- White Cotton Fabric - Amazon
- Artificial Mixed Berry Plant Pick - Walmart
- String of Pearls - Amazon
Cara


Cara, aw they turned out so adorable. I love working with rub-on transfers. Those are perfect additions to any Spring decor. Thank you for sharing your tutorial with us. Have a wonderful weekend.
ReplyDeleteThank you Stephanie, I have found I enjoy working with them as well.
DeleteThese are amazing, Cara! I love they way they came together. I had no idea you could use rub on transfers in so many different ways. I've never tried them but always wanted to so I'm thankful that you've shared this series so we can learn how to use them on a variety of mediums. They're such a fun and festive way to decorate for the spring season. Hugs, CoCo
ReplyDeleteThank you CoCo, I am happy I was able to show others how to use them. It was all new to me at Christmastime, and I have to say, I think I am hooked now. I have been surprised what they will stick to, it doesn't just need to be a flat surface, more coming on that idea. ;)
DeleteAdorable! I never would have thought to use rub-ons on fabric.
ReplyDeleteThank you Ann! I have been experimenting with rub on transfers to see what all they will stick to. I can't tell you how much fun it has been.
DeleteHi Cara! These turned out so cute! I think I have a couple of embroidery hoops laying around, so I appreciate the inspiration! Glad to know transfers work on fabric! Love this idea!
ReplyDeleteYou just made my day Donna! I started this blog to share inspiration and ideas with others. Crafting, using items around the house without making a lot of purchases is my mantra. Too often, I see folks paying so much for decor items everyone else has, who wants to do that? March to your own beat, and do you, it's the way I live my life.
Delete